🏆 Built to Scale, Not to Break: How We Eliminated Bottlenecks Without Increasing Infrastructure Costs

There was a time when scaling meant adding more VMs.
Traffic goes up? Add a server. CPU spikes? Resize the instance.
It worked… for a while.
But eventually, it didn’t.
More servers just meant more management. More maintenance. More complexity.
And even with extra capacity, the same issues kept coming back.
That’s when I realized something important.
The problem wasn’t capacity.
It was architecture.
So instead of adding more machines, I changed the approach.
I used the Azure Kubernetes Service — not just to use Kubernetes, but to build a system that can adapt on its own.
🔄 The Shift: From Servers to Workloads
Before AKS, my mindset was tied to infrastructure:
- Which VM is overloaded?
- Do I need a bigger instance?
- Should I spin up another server?
After AKS, the questions changed:
- Is my application healthy?
- Are my pods scaling properly?
- Is traffic distributed efficiently?
That shift alone changes how you design systems.
Because Kubernetes doesn’t care about your servers.
It cares about desired state.
🧠 What AKS Really Solves
With AKS, I stopped dealing with:
- Manual scaling
- Load balancing configurations
- Node lifecycle management
Azure handles all of that.
Instead, I define:
- How much CPU a workload needs
- When it should scale
- How many instances should exist
And the platform takes care of the rest.
🛠️ The Build (Simple but Powerful)
I kept the setup intentionally simple:
- 1 AKS cluster
- 1 node pool (autoscaling enabled)
- 1 containerized app (
vtoxzy/webme) - 1 public LoadBalancer
Create AKS Cluster
Using Azure GUI
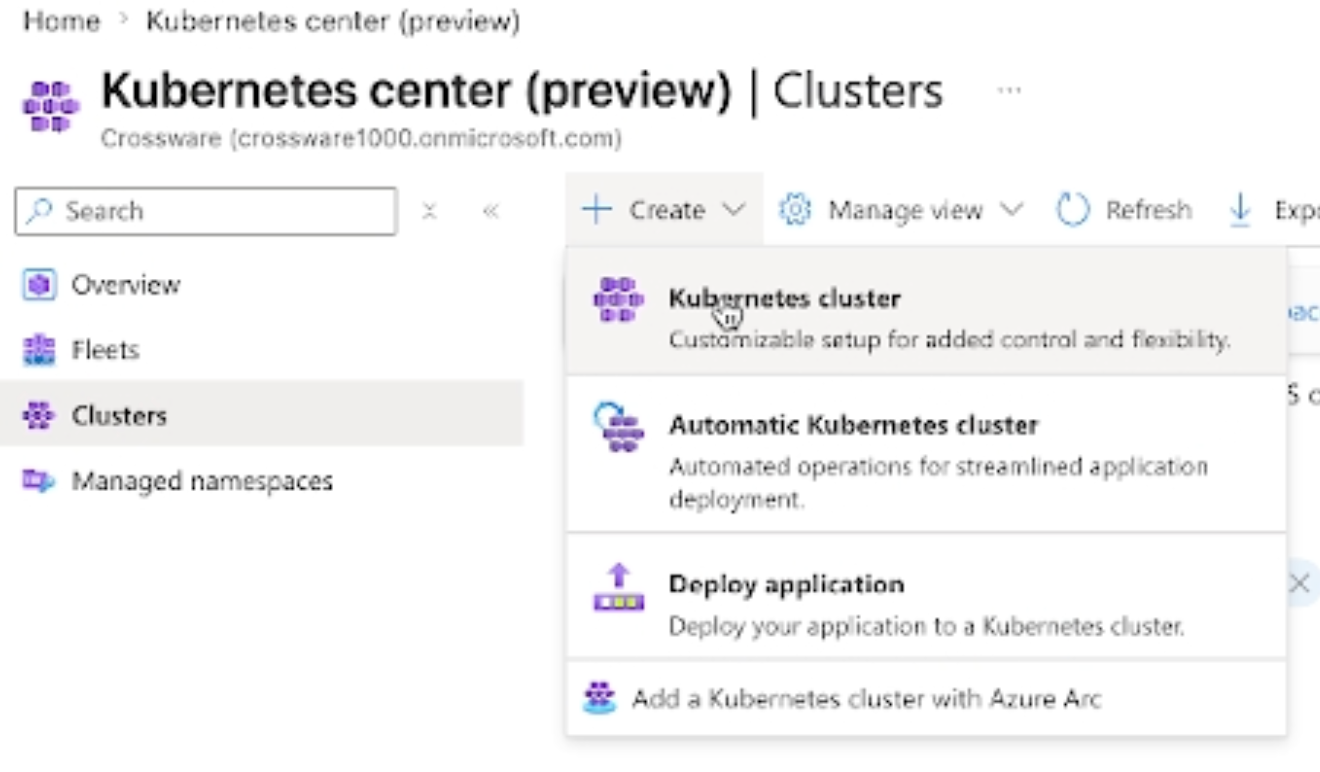
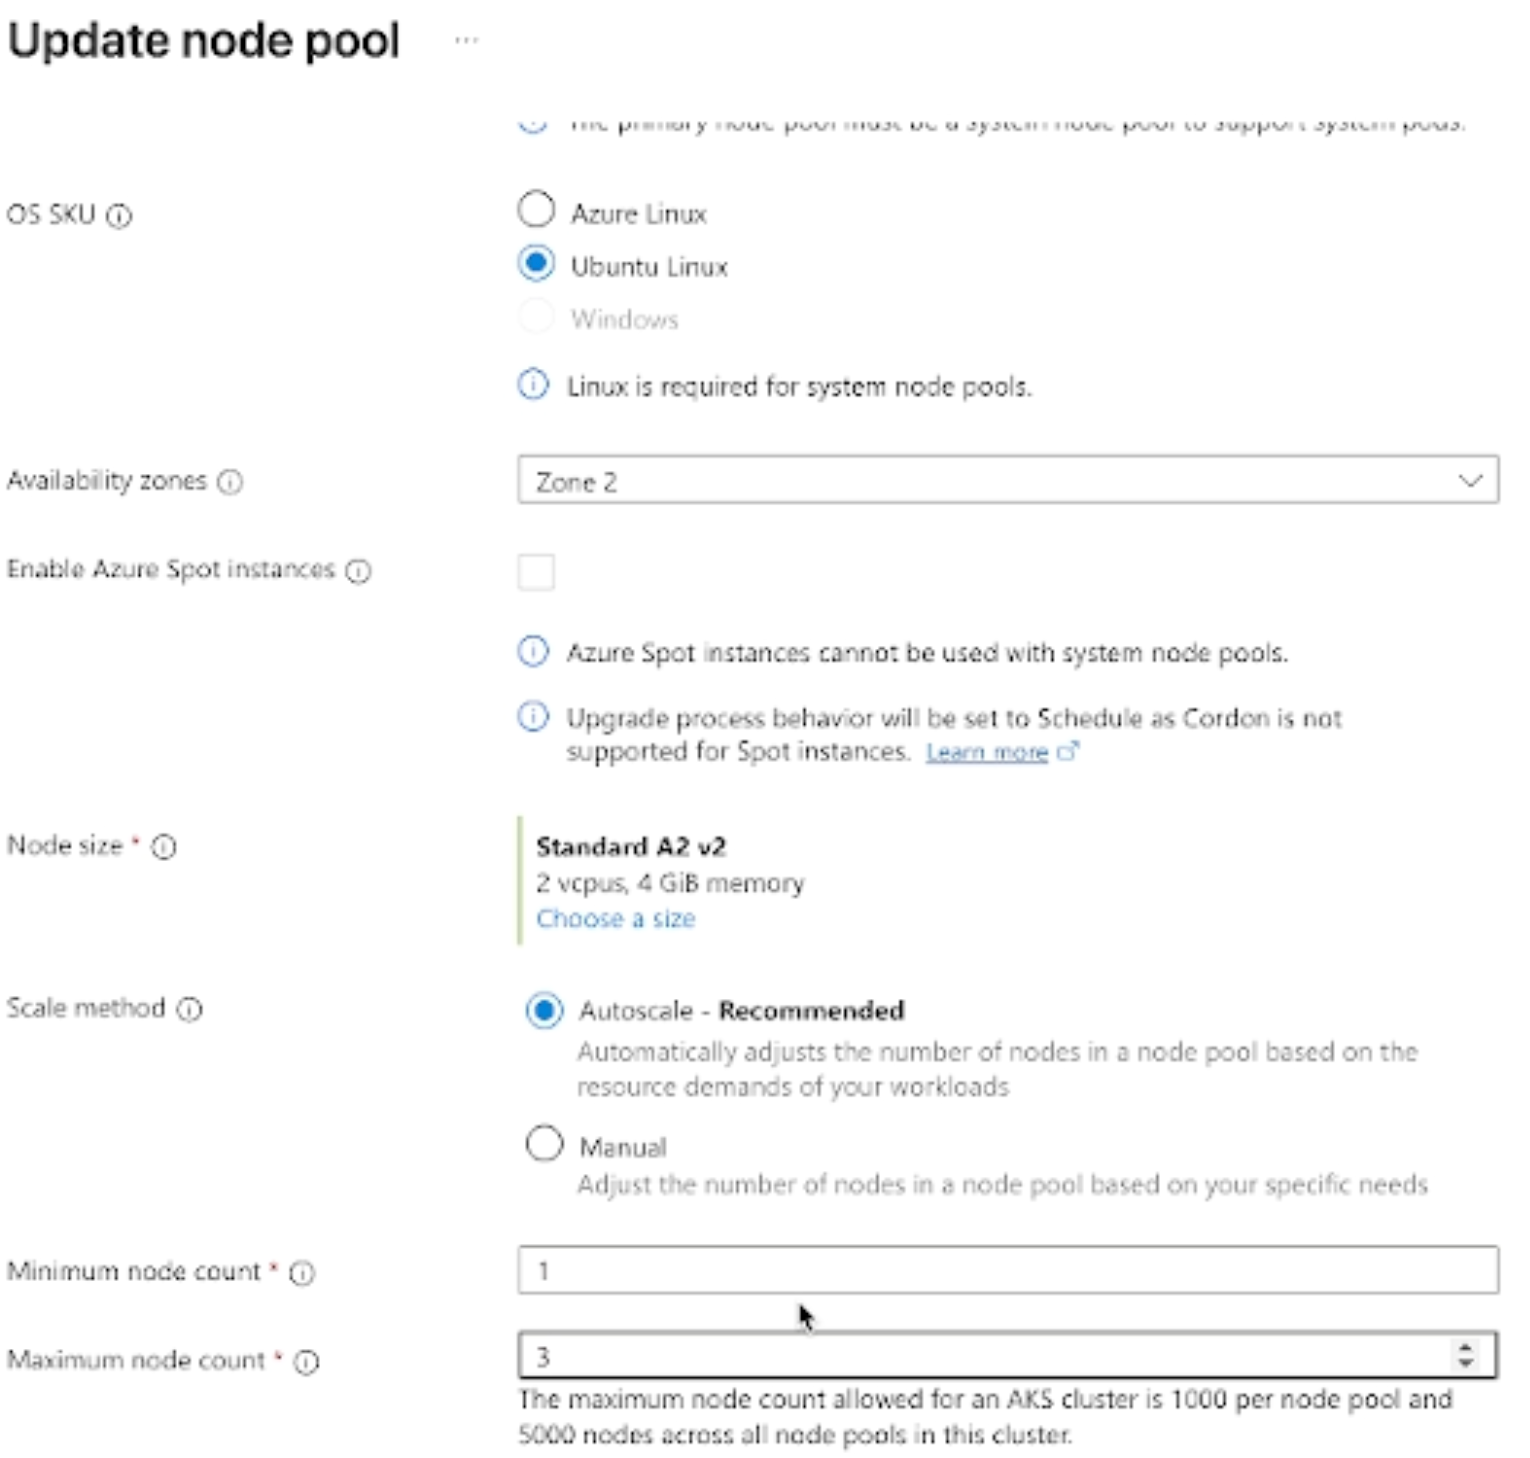
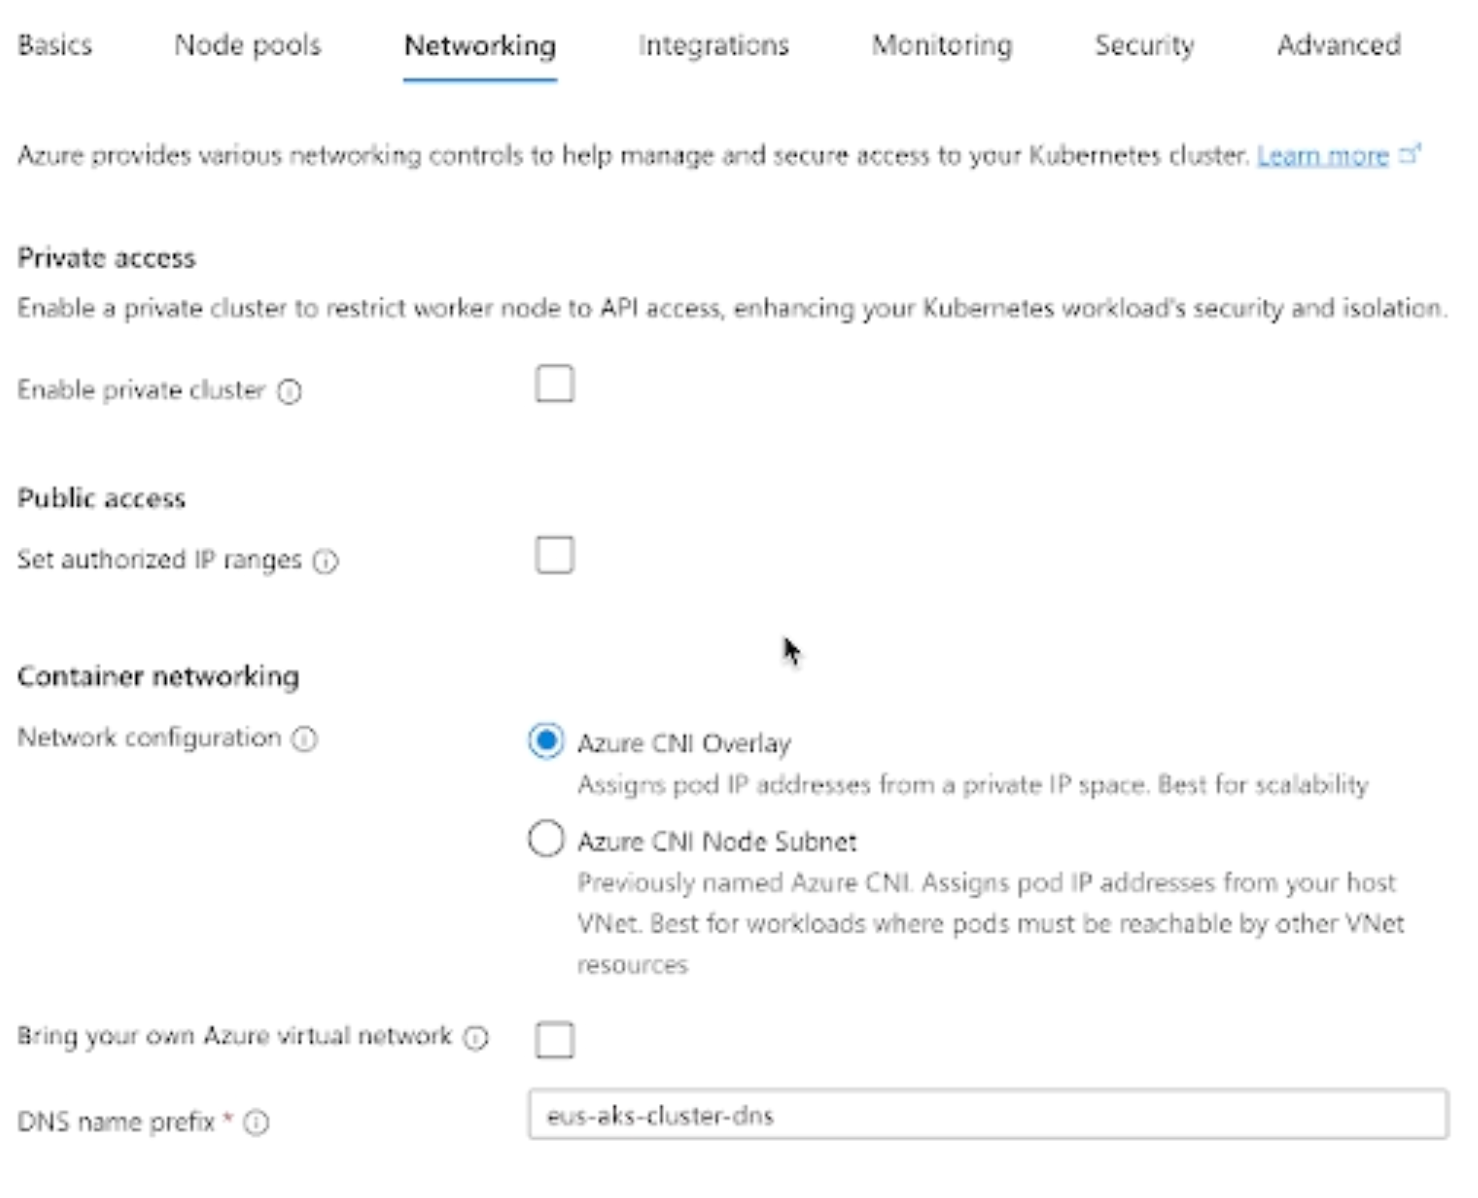
Using Cloud Shell CLI
--resource-group CW-EUS-SUB1 \
--name eus-aks-cluster \
--node-count 1 \
--enable-cluster-autoscaler \
--min-count 1 \
--max-count 3 \
--generate-ssh-keys
Start small. Let it grow when needed.
Connect to AKS
--resource-group myRG \
--name myAKSCluster
Managing AKS
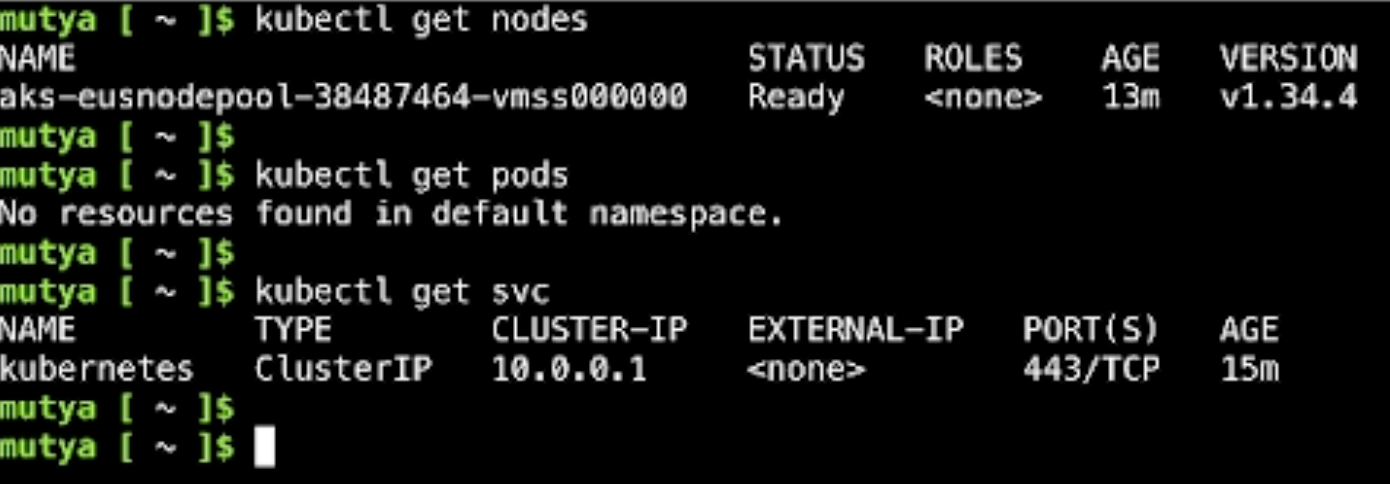
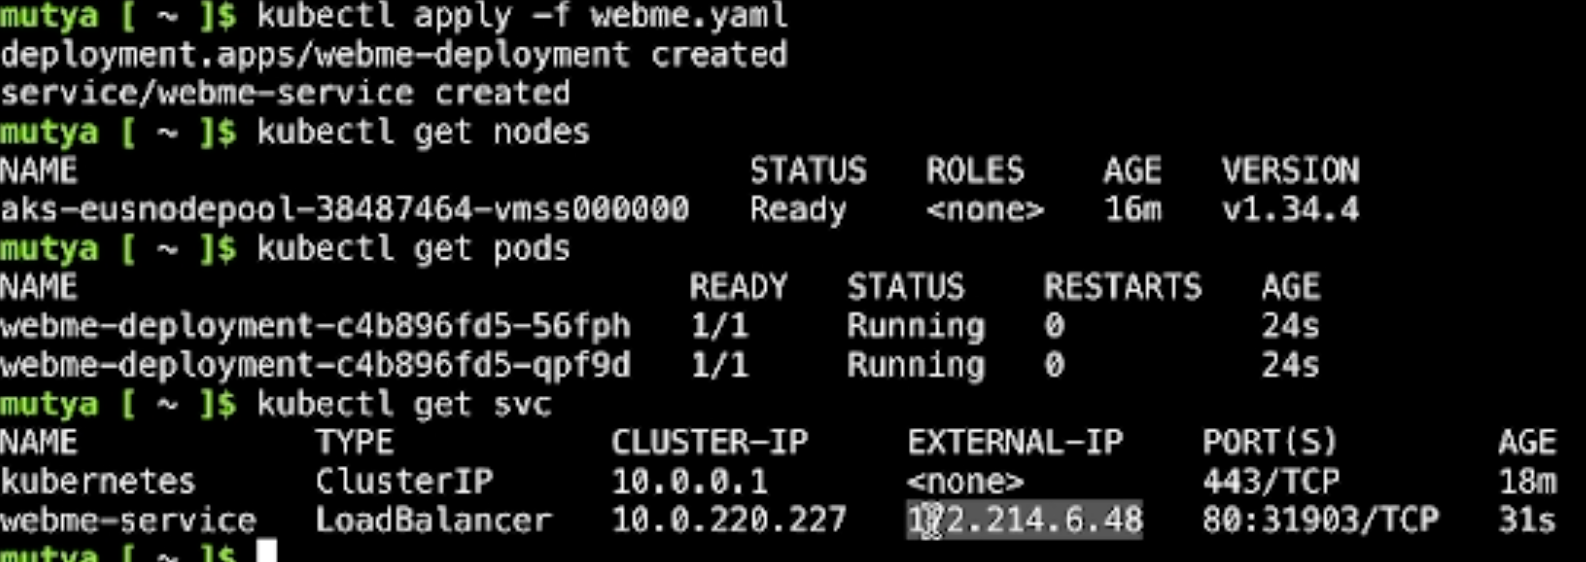
Here are the primary commands I use to check status:
kubectl get nodes — to check the number of nodes and their status
kubectl get pods — to check pod status
kubectl get svc — to check running service
Deploy Application
In Cloud Shell, create a YAML file.
- nano webme.yml
Deploy the application.
- kubectl apply -f webme.yaml
Verify the pods.
- kubectl get pods
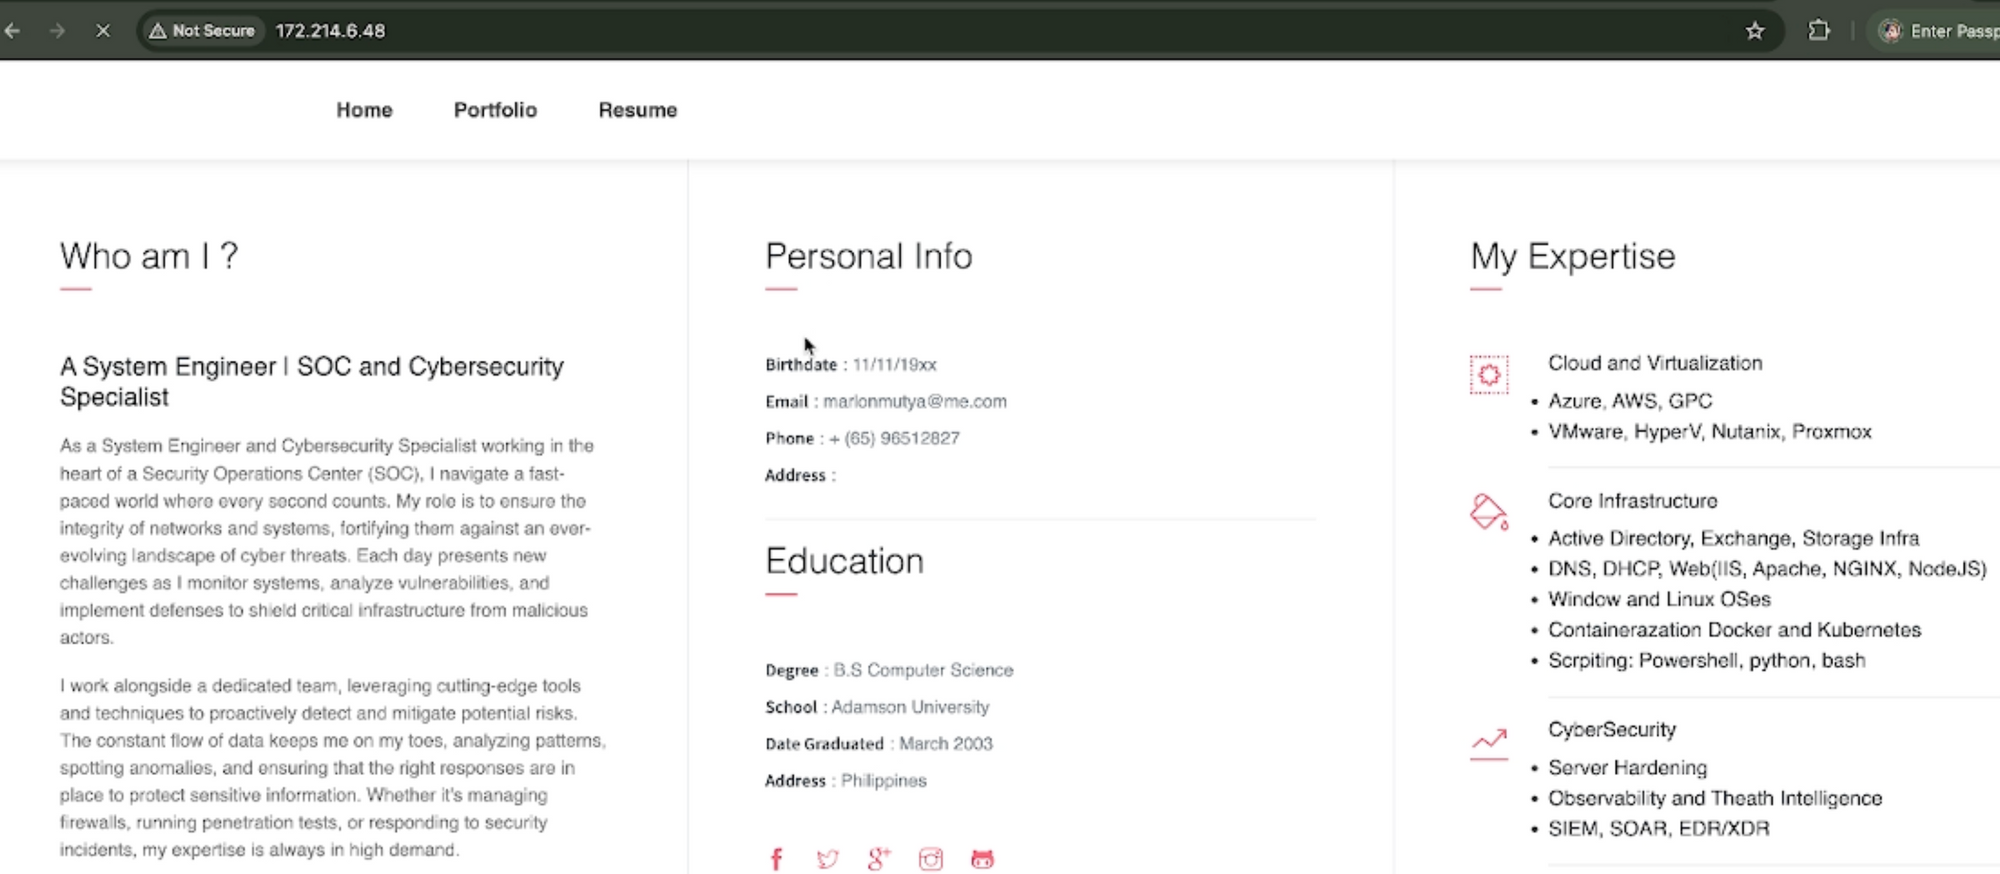
Check the public IP in the web browser.
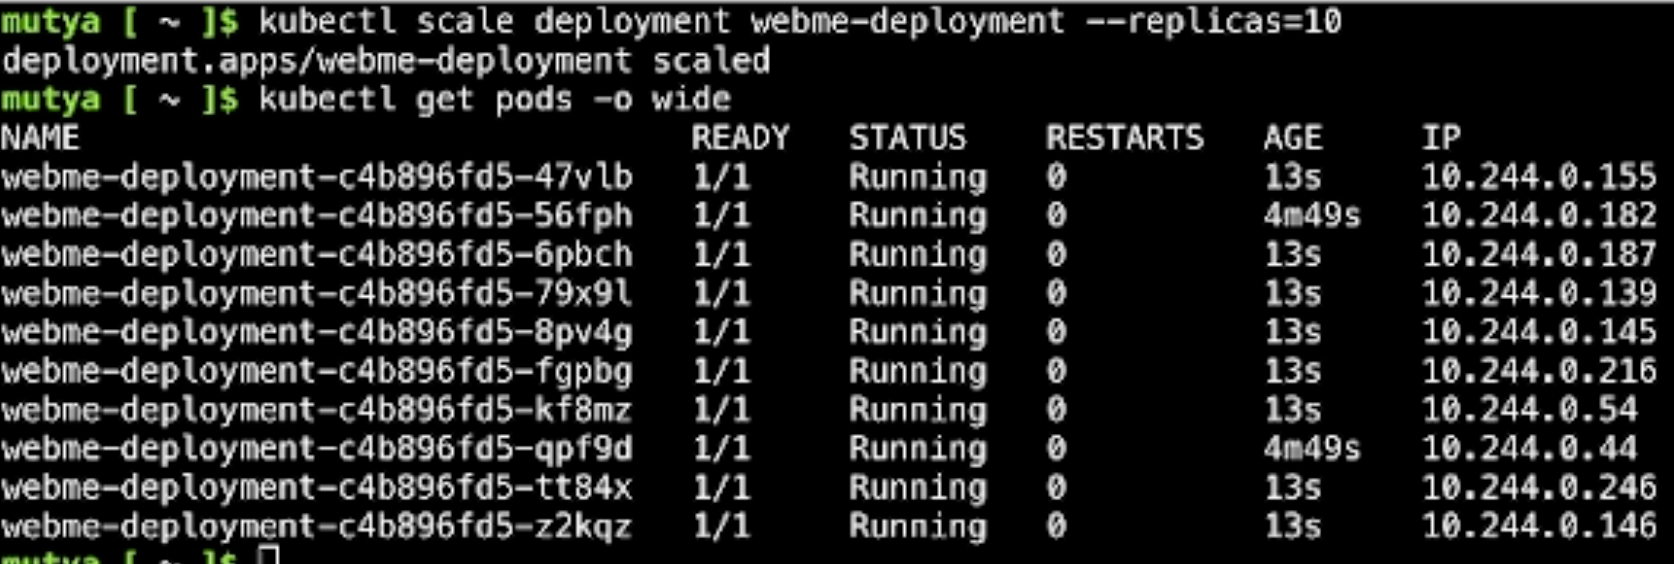
Add 10 pods.
- kubectl scale deployment webme-development --replicas=10
⚡ Where It Gets Interesting: Autoscaling
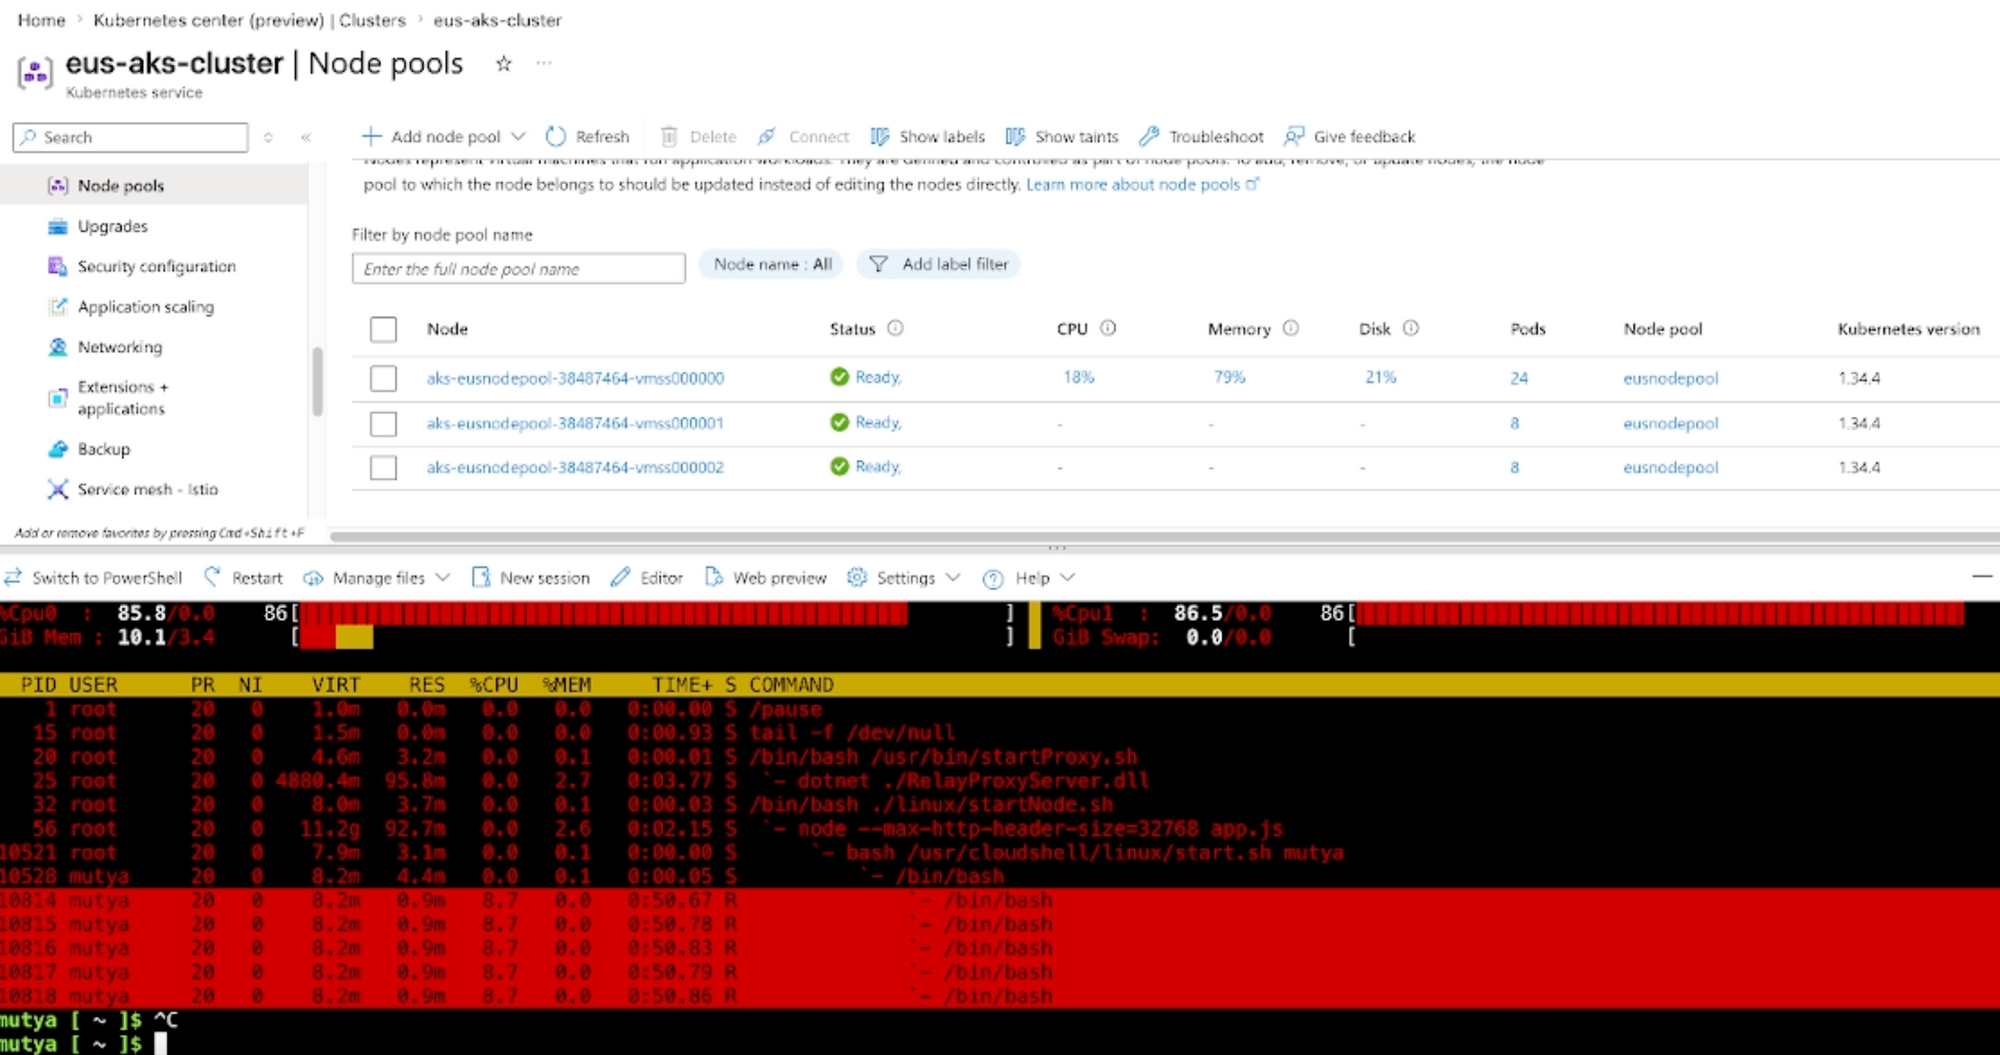
This is where AKS actually changes the game.
I enabled Horizontal Pod Autoscaler (HPA):
kubectl autoscale deployment webme \
--cpu-percent=50 \
--min=1 \
--max=5
Now the system behaves differently:
- CPU increases → more pods spin up
- CPU drops → pods scale down
No manual action.
No guessing.
💡 The Things That Will Break It
Kubernetes is powerful — but it’s not magic.
If you don’t define things properly, nothing happens.
Here are the common mistakes:
- ❌ No CPU requests → HPA won’t trigger
- ❌ Autoscaler disabled → nodes won’t scale
- ❌ Pods still fit in existing nodes → no scale-out
The system follows rules. You just need to set them right.
🧱 What Actually Changed
Before:
- Reactive operations
- Manual scaling
- Constant monitoring
After:
- Automated scaling
- Self-healing workloads
- Predictable behavior under load
And most importantly—
Less time fixing infrastructure.
More time improving systems.
🎯 Final Thought
A lot of teams think scaling means adding more servers.
But that’s just adding weight to the same problem.
Real scalability comes from systems that adjust themselves.
That’s what Azure Kubernetes Service gives you.
Not just more capacity.
But control over behavior.
🏁 TL;DR
- Stop thinking in VMs
- Start thinking in workloads
- Enable autoscaling early
- Define CPU requests properly
- Let the platform do its job
If your infrastructure still depends on manual scaling…
You’re not scaling.
You’re surviving.